tl;dr today I’m sharing my favorite mask pattern
Handy Guide to this Seriously Long Post
- Intro Blah Blah Blah 2020
- Mask Talk
- The TBv3+ (Cue Rainbows and Dramatic Music!)
- Many Photos of Same
- An Excessive Number of Notes
- Obligatorily Inspiring Quote!
* * *
Greetings, Fellow Travelers!
It’s been a while, but let’s just chalk that up to 2020 and move on, shall we?
Speaking of, it’s been a year, hasn’t it? We haven’t seen friends, family, or done anything more exciting than rescue feral kittens in months.*
Like so many of you, I miss my family.
I miss my friends.
I miss not knowing the latest hot news in epidemiology;)
I wanted to write about how things were going. I wanted to write something encouraging. I wanted to write, period.
But.
I just didn’t have it in me. And sometimes that just has to be ok. So I worked, managed and generally tried to keep my fashizzma together while the world did 2020.
I haven’t been writing. I haven’t been to the workshop. My sewing machine crapped out on me. I have been reading, at first to study a couple of new genres I wanted to understand from a writer’s perspective, but then I just wanted happy endings.
You know, those things that used to be a luxury but now feel like a necessity. At least to me.
But I’m slowly coming out of it. Fall is sliding into the cold sleep of winter but paradoxically, I’m waking up.
I had a story idea the other day. It wasn’t all that good, but whatever. Thank you, brain.
I’m also doing what a lot of people are doing. Buckling down, cooking, making masks, the quintessential pandemic pastimes.
And I had the urge to share. So I’m here today to share my favorite DIY mask pattern.
* * *
Mask Talk
Despite dramatic progress on the scientific front, we don’t have as many tools in the fight against Covid-19 as we’d like (I know, stating the obvious). What we can do, right now, is socially distance, wash our hands, and wear masks. Why masks? Check out this cool NYT interactive or this handy explainer to see why masks are effective.
Short answer, breathing other people’s spooge is nasty. Masks help.
There are a lot of ways to buy masks these days, and it’s certainly possible to find a variety of options for sale. But if you, like me, enjoy being able to customize your style, size and fabric, then this pattern may be for you.
In the early days of the pandemic a lot of civic-minded makers designed and shared mask patterns. One of the best I found for me and Mr. Man (whose face has a striking set of cheekbones), was this pattern by Tom Bihn (check out the videos and notes).
I’m sure I’m not alone in the search for a mask that fits my face, is comfortable and also effective. For me and Mr. Man, the Tom Bihn design is that mask. This spring, the company was agile enough to add mask production to their line, but also generous enough to share the pattern.
I like the shape and structure of that mask, but wanted a filter. The modifications Rachel posted are helpful, but I realized that the top seam was too thick for me. It added more bulk than was comfortable and all that fabric didn’t quite shape to my face.
Was that something I could fix? It was. Would Tom Bihn be open to me sharing this new version? Yes!
* * *
The TBv3+ (Cue Rainbows and Dramatic Music!)
I give you my modified mask pattern, the TBv3+ with a flat top seam and bottom filter pocket.**

* * *
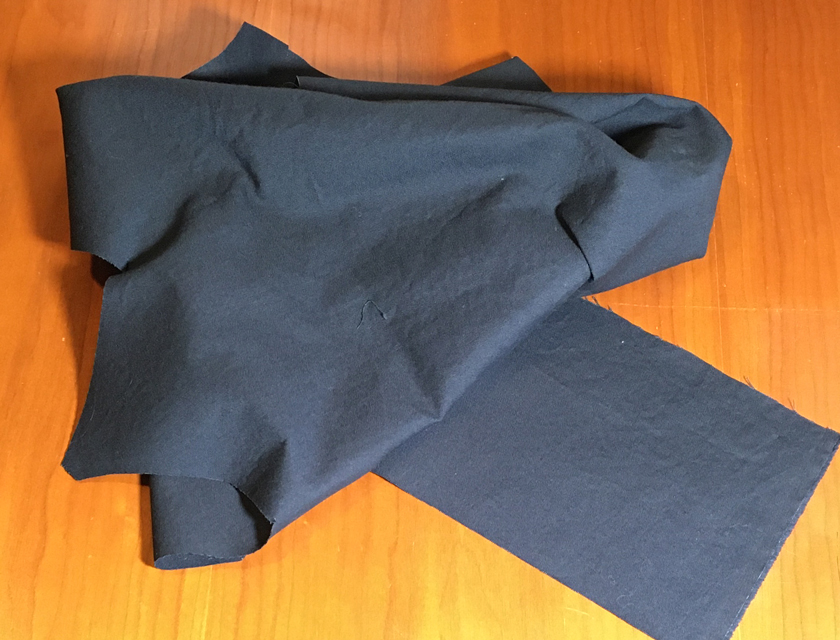
Many Photos of Same
I’ve streamlined the process a bit from my first versions, so hopefully the pattern will be relatively straightforward. I’m not set up for sewing videos but here are some photos to help you get started!
And we begin! 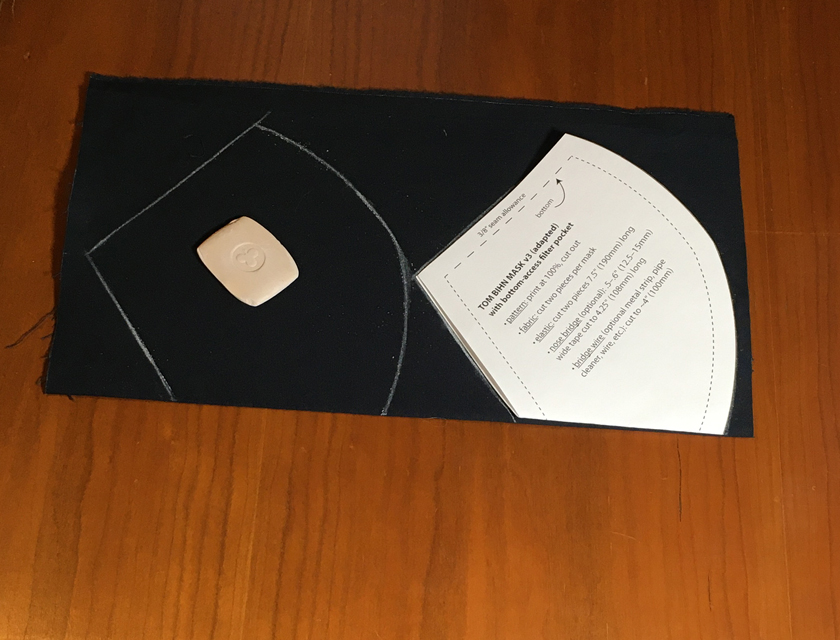
print & cut out pattern, fold it & fabric in half, trace pattern 
cut out two pieces 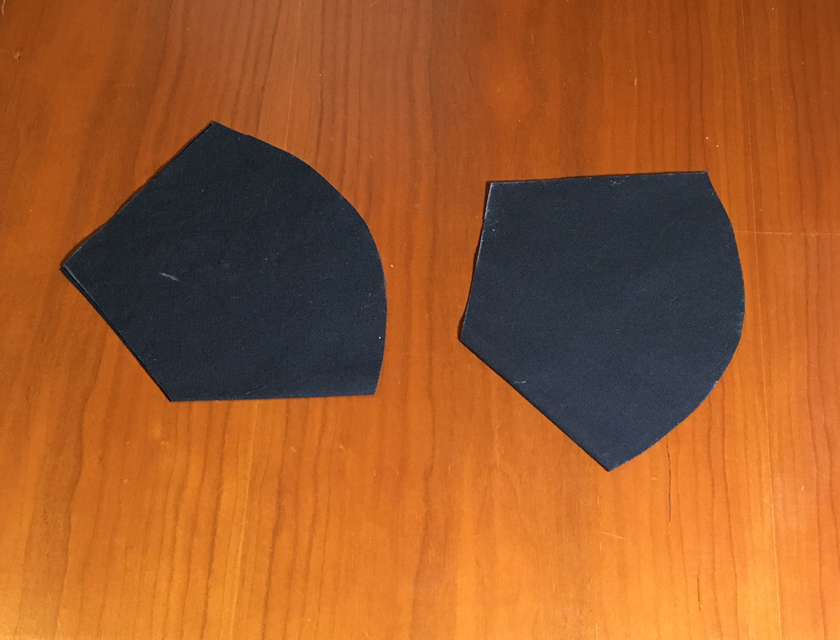
looks good, right? 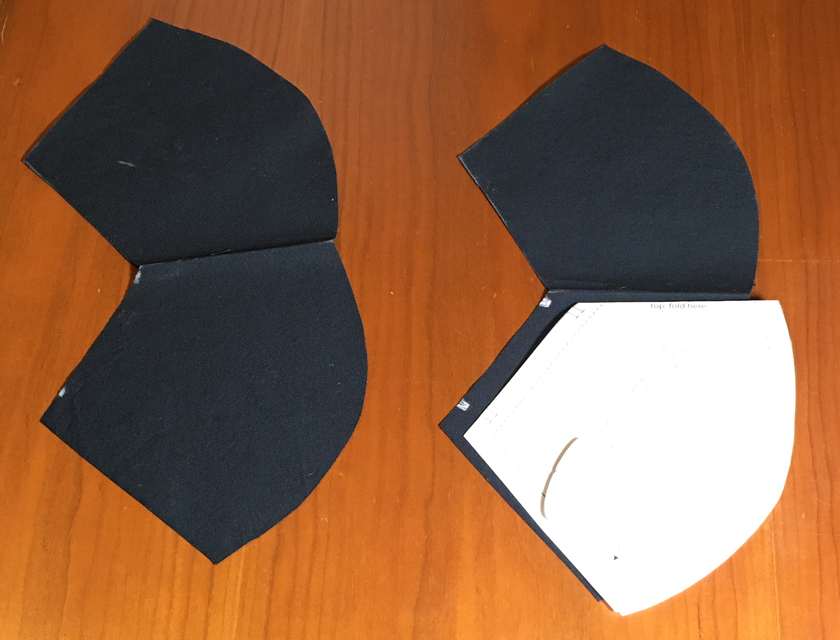
mark elastic anchor points 
find pesky elastic 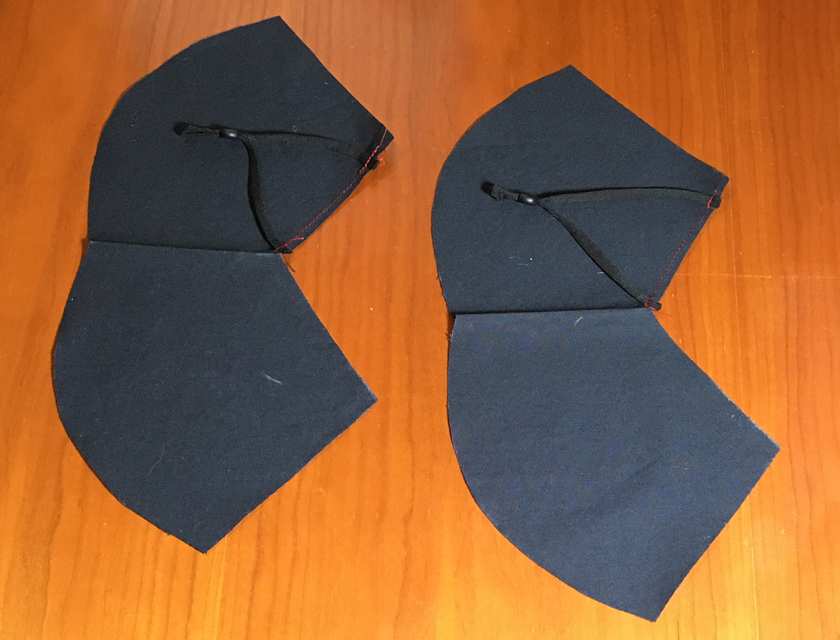
attach elastic 
align pieces 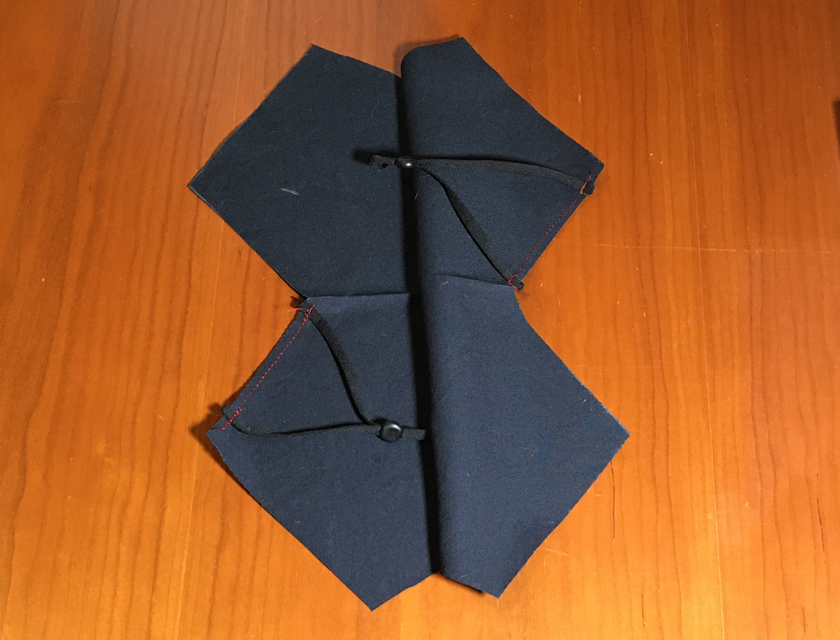
pair, with elastic inside 
come on baby, hold together! 
sew sides together 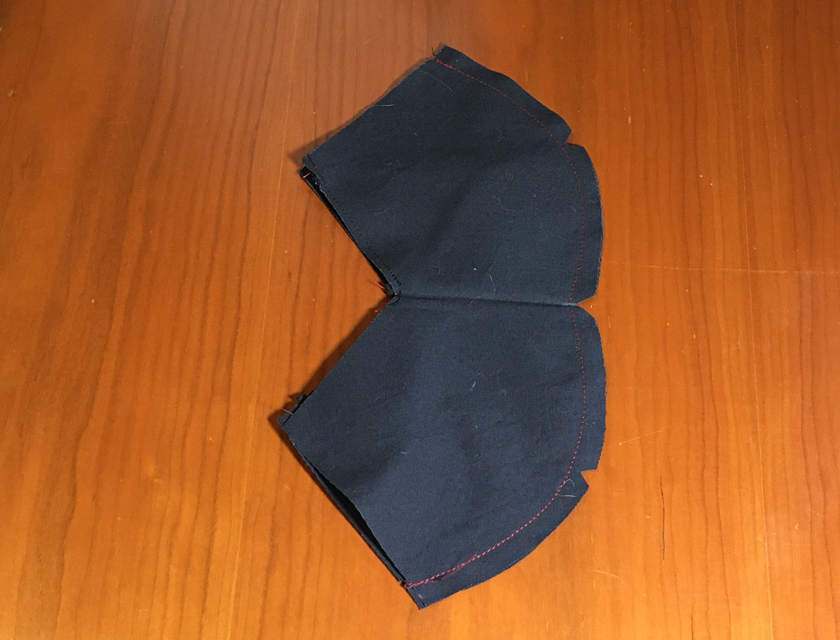
clip seam 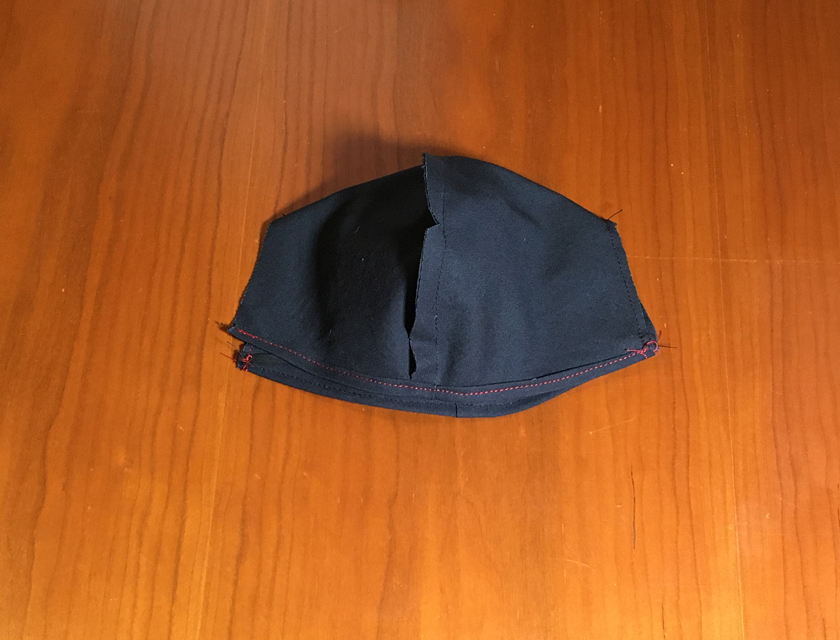
hem bottom edges 
stitch sides 
invert; almost there! 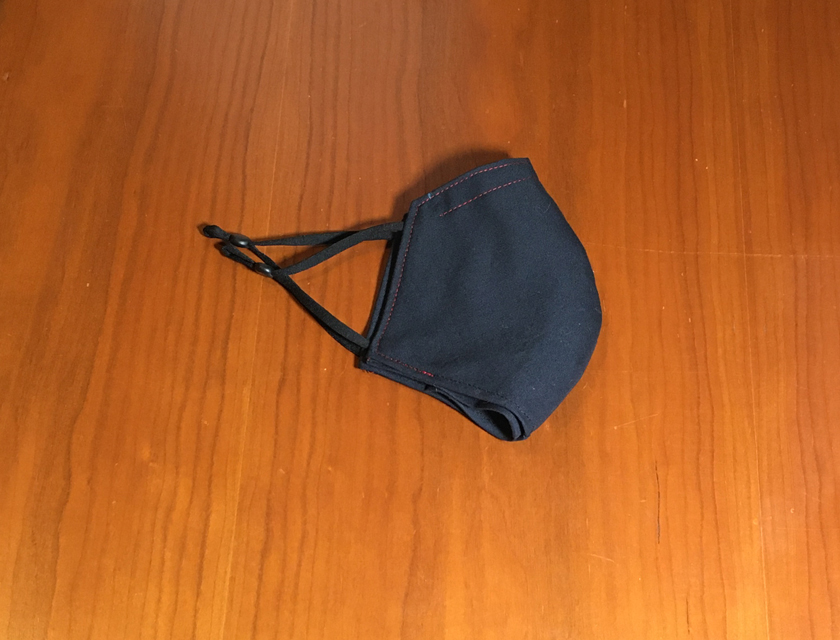
top stitch 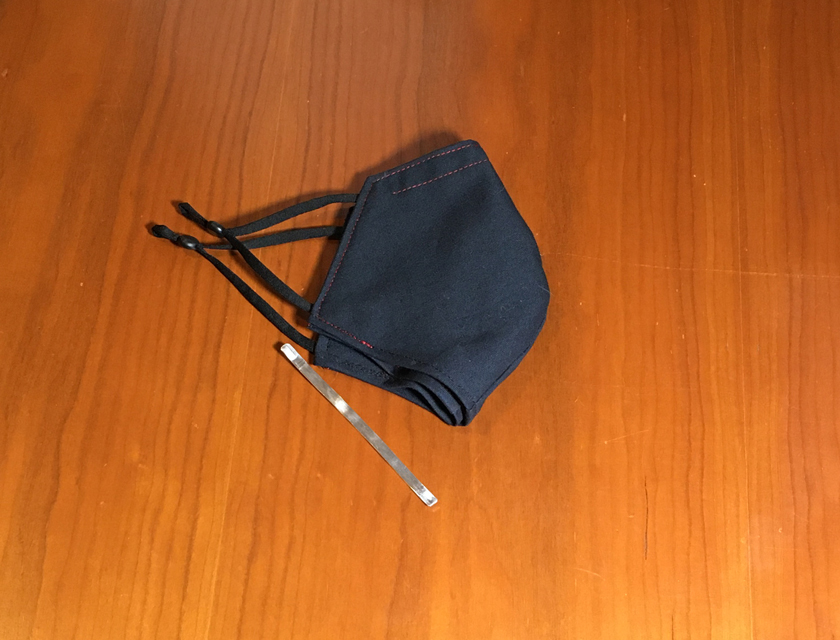
find pesky nose wire 
insert wire from the inside 
voila! revel in your accomplishment!
* * *
An Excessive Number of Notes:
— This mask is a medium size and fits me well. It’s a bit tight for Mr. Man (those cheekbones!) so for him I add 3/8” to the bottom seam and go from there. This extra bit of fabric is enough to cover his chin and keep the mask in place while he’s talking. If that still isn’t big enough for you, consider printing the pattern at 110%, which will give you more room all around.
— Fabric density does matter, so hold any potential candidate up to the light. If you can see individual fibers and holes between them, it’s not a great option. If it’s all you’ve got, bolster your protection with an extra layer of filter.
— Want different fabrics inside and out? Fold the paper pattern in half along the top seam line, then add 3/8” to the top seam. Cut out two pieces from your front fabric and two from the interior fabric. Stitch together at the top seam and proceed from there. You’ll have a thicker top seam (as with the original TB pattern) but it may be worth it to you if you like a smooth inner lining (Mr. Man requested this approach; some fuzzier fabrics were interfering with his Movember).
— I flip things around a lot (I was probably 30 before I realized that my goofy childhood habit of flipping things was actually a touch of dyslexia, kudos to my parents and teachers for making it work), so one thing I have to watch out for with this pattern is where to put the elastic. It can feel backward to start sewing on the right/outside of the fabric, but that’s the way to do it. Stitch away!
— On nose bridges: The first draft of this pattern added an external fabric nose bridge to the outside of the mask in the final step. It works and makes it very easy to change out the nose wire, but it does add more fabric and is a bit fiddly. By the time I finalized the pattern I’d shifted to adding one additional stitch line, centered below the top seam. If you leave a half inch or so on either side, it’s fairly easy to slip a nose wire into the resulting pocket from the inside of the mask. That’s what I do now.

— On nose wires: Of all the options I tried, a thin strip of aluminum was the best. I ordered rolls of aluminum because it was so much cheaper than the pre-cut version, but if I had to do it over again I’d go with pre-cut. Freshly cut aluminum is sharp, y’all, and sanding it down is tedious. Other options I’ve tried in descending order of effectiveness: heavy-duty floral wire in foam (effective but annoying to slide in), the industrial twist-ties from Vistaprint masks (good but not quite stiff enough), doubled-over pipe cleaners (weak), thin floral wire (very weak). You may have other options.
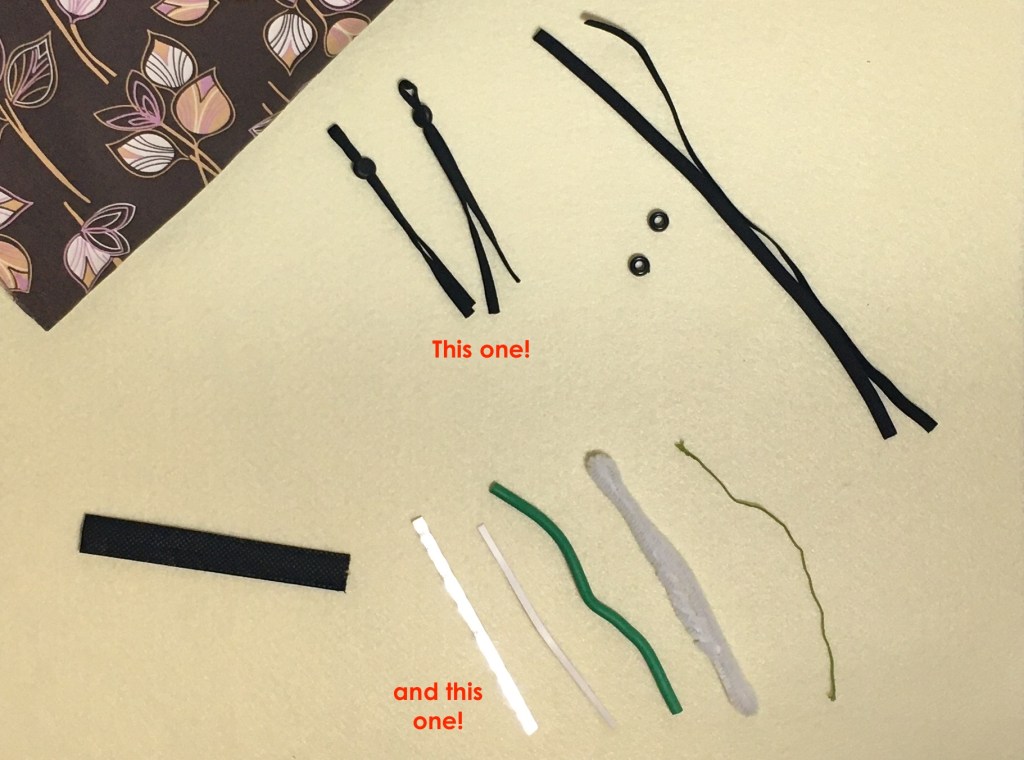
— On elastic: lots of options here too, from the thick white kind harvested from an old fitted sheet to pre-cut resizable versions. I’m using the latter now because it’s faster and less annoying, but I had good luck with 6mm elastic from my local fabric store, with or without little plastic pony beads (what do ponies have to do with it, I wonder?) for sizing adjustments. (If you go with the pony beads, add an inch or so to the elastic length and tie a knot on the end to keep the bead from slipping off in the middle of Costco. Ask me how I know!)
— Is that it? Probably not, but hopefully it’s enough to get you started. If you have questions, check out the linked TB videos or let me know.
Even More Notes:
* Granted, it’s been a lot of kittens. A kindle of kittens, even! Cute as heck, but consider supporting your local animal rescue organizations; Humane Society and neutering program closures have started a wave of ferals and strays, and winter. is. coming.
** The usual caveats apply: no mask is 100% effective, fabric density matters, adding a filter helps, cover both nose and mouth while wearing, wash after wearing, social distance, wash your hands a lot, etc. Fun times, am I right?
* * *
Congratulations, you’ve worked your way through all this text! As a thank you, here’s an Inspiring Quote from someone who lived through much worse than this year and used it to create things both astonishing and beautiful.
Stay healthy, stay safe!
* * *
Obligatorily Inspiring Quote!
The world is indeed full of peril, and in it there are many dark places; but still there is much that is fair, and though in all lands love is now mingled with grief, it grows perhaps the greater.
― J.R.R. Tolkien


You must be logged in to post a comment.