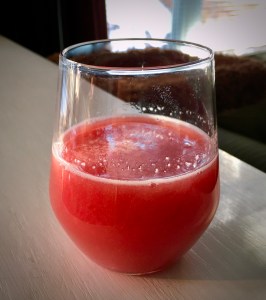
In these, my last days of vacation, I bring you a delicious discovery: the guava cranberry mimosa!

So that’s my afternoon. Hope you’re enjoying yours too!
Posted in Food and..., tagged #365Ways, #365Ways2021, #frostyadultbeverages on January 2, 2021| Leave a Comment »
In these, my last days of vacation, I bring you a delicious discovery: the guava cranberry mimosa!

So that’s my afternoon. Hope you’re enjoying yours too!
Posted in Food and..., Likes, tagged #ThingsILike, baking, cake, lemon, nom! on October 3, 2019| Leave a Comment »
Today, a recipe!
I decided to take this year off from birthday cakes, but I did make the delicious bite-sized treats that are madeleines. Reminiscent of pound cake but more flavorful, these French cakes have been one of my favorites for years. Now I’ve got the recipe down. Good thing, because they don’t last long!
***
This is a simple recipe with terrific results. The only real surprise is the amount of chilling time, so plan ahead. Also, I was fortunate enough to inherit a set of traditional European madeleine pans, and with the liberal application of butter and flour they work well. That said, if you don’t happen to have these single-purpose pans, I’ve had decent luck making them in cupcake liners. The shape is different, of course, but the edges pick up a small flute from the liners. The darker cupcake pan made the bottoms cook a bit too fast, but cut baking time by a minute or so and it should turn out fine.
On ingredients:
I use organic unbleached all-purpose flour (thank you, Costco) but you don’t have to. I also use granulated sugar that’s been toasted to bring out a caramel flavor that’s subtle but noticeable. If you have the time to do this, I suggest making a big batch so you have extra. It’s great in everything. As a note, I toasted a batch of organic sugar but pulled it after an hour. Turns out the higher molasses content means it’s faster to melt and burn, so keep an eye on it if you go that route. Still tasty!)
On rise:
There’s also a whole debate around whether to baking powder or not to baking powder. The traditional approach is most definitely (and defiantly)not, but it’s up to you. I am still haunted by a pre-teen angel-food cake debacle (pancake, meet actual cake, also tears and a lifelong dislike of recipes that rely solely on whipped egg whites for volume). I use the baking powder. It worked well, even when I let the batter sit in the fridge for 6+ hours, and tasted fine. Just be sure your baking powder doesn’t contain aluminum.
On lemon flavor:
I like love the flavor of lemon but am not fond of chewy, waxy, dry lemon peel. I leave it out here, but if you find yourself with a nice, thin-skinned organic lemon on hand, I say use the zest. I also boosted the amount of glaze because the smaller amount in the original recipe didn’t quite stretch far enough. (I also use all lemon juice because I’m crazy like that, but the water will help it flow. Adjust as you like. Or use lime juice. Or 2T. orange concentrate, 1T+ water.)
***
And as a bonus for Mr. Man’s father and all who love writing, a taste of literature:
An exquisite pleasure had invaded my senses … And suddenly the memory revealed itself. The taste was that of the little piece of madeleine which on Sunday mornings … my aunt Léonie used to give me, dipping it first in her own cup of tea or tisane. The sight of the little madeleine had recalled nothing to my mind before I tasted it.
— Marcel Proust, À la recherche du temps perdu
I prefer lemon glaze to a tea dip but the choice is yours. Whatever you do, have fun:) Also, here’s a picture for you, showing the perfect amount of browning. It’s not my picture as I ate all my madeleines before I thought to get a shot (because delicious:).
***
Lemon-Glazed Madeleines
Makes about 24 cookies
Adapted from this recipe (in The Sweet Life In Paris by David Lebovitz)
Cake:
3 large eggs, at room temperature
2/3 cup (130g) granulated sugar, toasted
rounded 1/8 teaspoon salt
1 1/4 cup (175g) flour
1 teaspoon baking powder (optional)
zest of one small lemon (optional)
9 tablespoons (120g) butter, melted and cooled to just above room temperature, plus additional melted butter for the molds
Glaze:
7/8 cup (175g) powdered sugar
3 T. freshly-squeezed lemon juice
1 t. water
pinch salt, to taste
Prep pans and batter:
1. Thoroughly brush the indentations of a madeleine mold with melted butter. Dust with flour, tap off any excess, and place in the fridge or freezer. (Haven’t tried this with non-stick spray because it weirds me out but I imagine that works too.)
2. In the bowl of a standing electric mixer, whip the eggs, granulated sugar, and salt for 5 minutes until frothy and thickened. (Don’t have a standing mixer? use the regular kind, because honestly.)
3. Spoon the flour and baking powder, if using, into a sifter or mesh strainer and sift over the batter in batches, using a spatula to fold in each batch of flour. (This is a little tedious but worth it.)
4. Add the optional lemon zest to the cooled butter, then dribble the butter into the batter a few spoonfuls at a time, while folding each time to incorporate the butter. Fold just until all the butter is incorporated.
5. Cover the bowl and refrigerate for at least 1 hour. (Batter can be chilled for up to 12 hours.)
Wait, then bake:
6. To bake: preheat the oven to 425 degrees.
7. Plop enough batter in the center of each indentation with enough batter which you think will fill it by 3/4’s
(you’ll have to eyeball it, but it’s not brain-surgery so don’t worry if you’re not exact; I used a rounded 1 1/2 t. cookie scoop) Do not spread it.
8. Bake for 8-9 minutes or until the cakes just feel set (10 minutes for me with baking powder; the tops will be light but the fluted base should be a light-to-medium brown). While the cakes are baking, make a glaze by stirring together the powdered sugar, lemon juice, water and salt until smooth.
9. Remove from the oven and tilt the madeleines out onto a rack. The moment they’re cool enough to handle, dip each cake in the glaze, turning them over to make sure both sides are coated and scrape off any excess with a dull knife. After dipping, rest on the rack, scalloped side up, until the cakes are cool and the glaze has firmed up.
Storage:
Glazed madeleines store well uncovered or loosely-wrapped. They can be kept in a container for up to three days, if necessary (but, yeah, they won’t last that long. Unless you are a saint. Are you a saint? I am not). These also froze fine in a plastic bag, then defrosted on the counter. Emergency madeleines for the win!
Posted in Food and..., Likes, tagged #frostyadultbeverages, #summer101, #ThingsILike, #thingsthatmakemegonom, food, garden on July 16, 2018| Leave a Comment »
Tonight’s dinner:
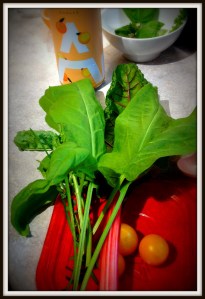
pasta with citrus shrimp and French sorrel, Swiss chard, lemon thyme, basil, garlic chives and cherry tomatoes from the garden.

This is about the extent of our bounty so far. It may have been 94F today but it’s still Canada, the growing season starts late and ends early. Still fun!
The astute observer may also have noticed a bright splash of color in the background. That’s my favorite new summer beverage, Ace Hill’s grapefruit Radler. So, so much nommity goodness!
/yeah, I’m buying it by the case
#noregrets!
Posted in Favorites, Food and..., Likes, tagged #fuelforwriters, #UniTheUnicornCake, awesome, baking, cake, food, fun, inspiration, recipes, yay on July 7, 2018| 4 Comments »
This is the latest version of my favorite chocolate cake recipe. It has been used (extensively) for layer cakes, sheet cakes, and cupcakes. Why a new recipe? With tweaks to the fat portion of the ingredients, this version has even more flavor (sorry, Canada, flavour), than the original, and is still simple, easy and quick to make. Oh, and if you happen to forget the butter and coconut oil in the microwave, this works as a fat-free recipe too. Ask me how I know;) I’ve also included an updated frosting recipe, because that’s what friends are for. It’s metric, because these days, that’s how I roll.
I like it. I hope you do too!
Truly Excellent Chocolate Cake, v. 2.0
Cake:
2 C. sugar (400g), half white, half brown
2 C. all-purpose flour (250g)
3/4 C. cocoa powder (88g)
2 t. (11.5g) baking soda
1 t. (4.3 g) baking powder
½+ t. (5g) kosher salt
2 eggs
1 C. buttermilk (or 1 scant cup milk, warmed with 1 T. white vinegar)*
1 C. coffee
2.8 oz. (80g) butter, melted
1.16 oz. (33g) coconut oil, melted
2 t. vanilla
1. Preheat oven to 350F. Prepare one 9″ x 13” pan, two 8/9” cake pans, or 24 standard muffin tins, with butter and flour/cocoa powder or line with parchment paper (a lot less trouble).
2. Mix sugar, flour, cocoa, soda, powder and salt in a large bowl.
3. Add remaining ingredients, beat for 2 minutes.
4. Pour into baking pans and bake until tester comes out clean (30-35 minutes for cake pans, 35-40 minutes for large pan, or 22 minutes for cupcakes).
5. Let cool 10 minutes and remove from pan. Frost when cool.
* Note: I usually make a cup of coffee in a 2C glass measuring beaker, then add the vinegar and fill up to the two-cup line with milk. Voila!
. . . . . .
Buttercreamcheese Frosting:
100g butter, softened
160g cream cheese, softened
560g powdered sugar
pinch of salt, to taste
~½ t. vanilla
2 T. lemon juice, or some combination of lemon, orange juice concentrate, milk, cream, and/or Grand Marnier; this is the flavoring portion so tweak at will!
1. Cream butter and cheese together until whipped smooth, fluffy and white (can take up to 5 minutes but it’s worth it).
2. Sift powdered sugar, add to butter mixture in two parts, blend.
3. Add flavorings and beat another ~3 minutes until smooth, light, and spreadable. Adjust liquid as necessary to reach desired thickness.
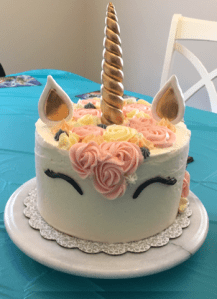
Works well for anywhere you need a mostly white frosting, and colors well. Just ask my friend Uni the Unicorn!

Uni the Unicorn was a present for a six-year old’s birthday: Six layers of chocolate cake with buttercreamcheese frosting, a little marshmallow fondant for the eyebrows, and magic!
Posted in Food and..., tagged #ThingsILike, baking, cake, creativity, food, fun, home, wedding cake, yay on April 20, 2017| Leave a Comment »
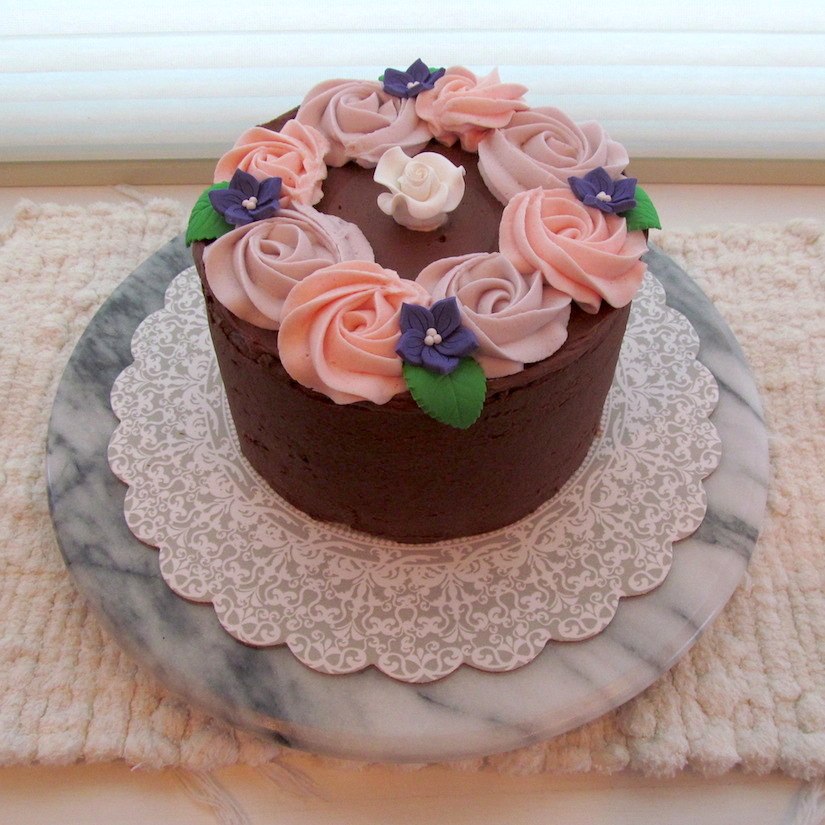
You may have noticed that I’ve been on a baking kick. It’s probably time to give my pancreas a break and go back to salads, but here’s one last* cake for you. Four layers, chocolate, more chocolate and raspberry.

. . . . . . . . .
* Let’s get real, it won’t be the last, but I am planning to slow down the baking. A little:)
Posted in Food and..., Holidays, tagged #bunnybutt, #ThingsILike, cake, Easter, food, home, yay on April 16, 2017| 2 Comments »
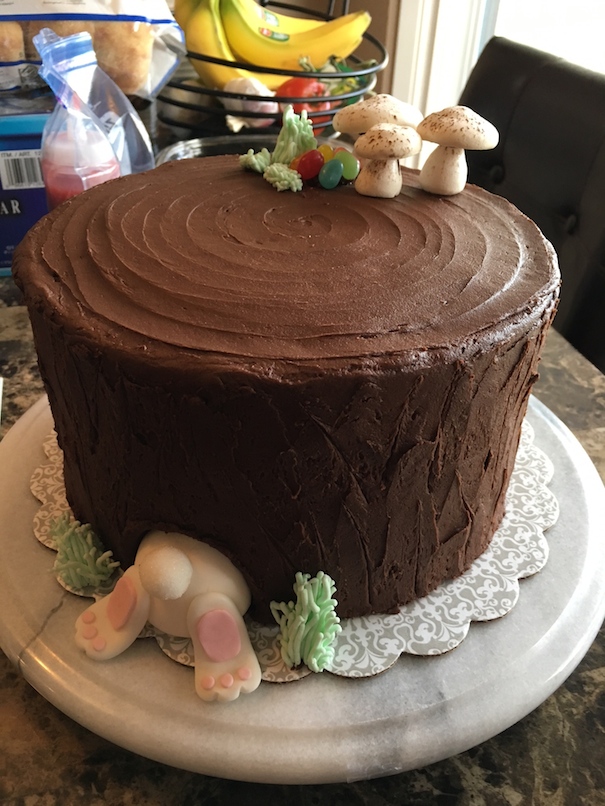
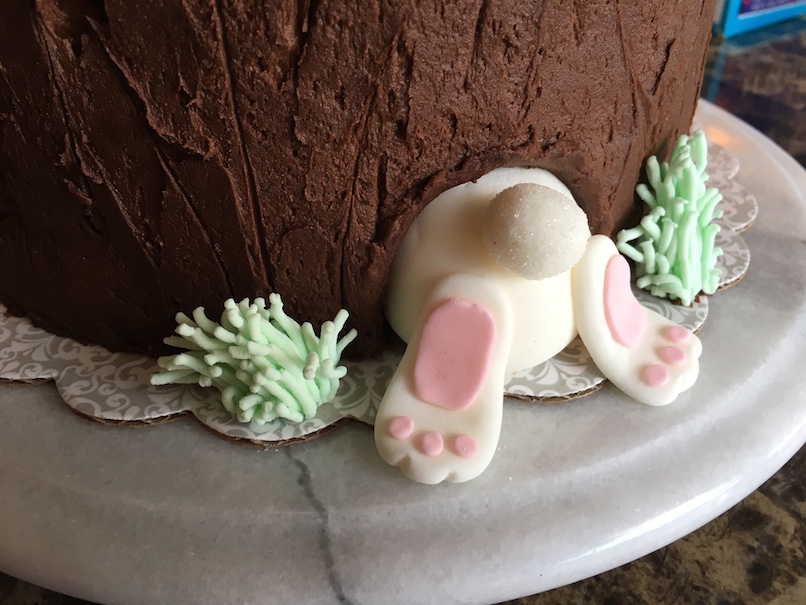
Chocolate frosted meringue mushroom strawberry reduction fondant bunny chocolate cake.
/because awesome:)
Happy Easter!


Posted in Food and..., Likes, Science!, tagged #ThingsILike, awesome, Brød & Taylor, breakfast, DIY, fermentation, fodmap, food, fun, Harold McGee, home, NYT, recipes, science, yogurt on April 11, 2017| 7 Comments »
Making yogurt is easy, affordable, and (if you’re a kitchen nerd like me) fun. It can also give you a much better product than you’ll find in stores. The process is simple: heat milk to get rid of existing bacteria and denature the proteins, cool it, then add good bacteria and give it some time to work. That’s it.
I like writing, so this recipe will be wordier than strictly necessary. Don’t let that make the process feel daunting! It isn’t.
The tricky bits, and there aren’t many, are in the details. It helps to have a thermometer. It helps to have an oversized heavy-bottomed pot, a few things like a canning funnel and conveniently-sized jars, kitchen towels to help keep the yogurt warm as it cultures, and a Post-it to keep you from hitting the oven’s on button with your yogurt inside (ask me how I know!).
None of those things are necessary, however.
Search for information on yogurt-making and you’ll find a variety of alternate recipes and methods, from counter-top to Crockpot. We’ve distilled that information and found a way that makes thick, tangy lactose-free yogurt and works for us. Tweak at will!
Yogurt, Plain but not Boring
Ingredients:
1. Scald the milk: add milk to a large pot over low to medium-low heat. Cover and heat to 195℉, or until just simmering with bubbles forming around the edges.
2. Denature the protein: reduce heat to the lowest setting and hold the milk at 190-195℉ for 15 minutes.
3. Cool: remove from heat, uncover and cool to 115℉, or pleasantly warm to the skin.
4. Inoculate: Preheat the oven to 115℉, then turn off. Add a half cup of the milk to your yogurt starter, whisk together, then add the mixture to the milk and whisk until smooth. Leave in pot or move milk to containers. Fill one jar with ½ C. to use as starter for your next batch.
5. Culture: If using jars, place on a cookie sheet. Insulate containers with kitchen towels. Place in oven or other warm spot. Let sit for 6 to 20 hours, then store in the refrigerator.
Transfer the starter to the refrigerator after ~6 hours to keep bacteria healthy. Longer cultures produce thicker and tangier yogurt. If you’re lactose-intolerant, culture for 18 to 20 hours to give the bacteria time to digest the lactose for you. No pills necessary!

Bacteria at work. Yum.
. . . . . . . . . . . . . . . . . .
Those are the basics. For a distillation of the tips and tricks we’ve learned over the years, read on!
Notes:
Optional: for your information only, here is the list of the tools we use to make yogurt:
We didn’t get all of these things at once, but as we realized we needed them and that we were in it for the yogurt long haul. I’ve found the remote thermometer to be the most useful tool for this, as it lets us be precise and to do other things while the milk is coming to temperature. We use an older version of this one, but there are a lot of options out there. Your needs may vary!
For even more information on the technique and science of making yogurt, I recommend these sources:
Posted in Food and..., Likes, tagged #foodforwriters, #lightindarkness, #ThingsILike, 2017, baking, bribery, brookies, chocolate, delicious, food, home, Motivation, New Year, recipes, winter, writing, yay on January 13, 2017| Leave a Comment »
I’m slowly getting back into a writing routine after the holidays. Writing is hard work, and of course glucose is critical to brain function. That means I have an excuse to bake:)
I worked up this cookie recipe for a friend who is gluten-averse. It’s based on a recipe from MasterChef Australia contestant Harry Foster and produces rich chocolate cookies with a satisfying cake-like texture.
Brownie + Cookie = Brookies
1. Preheat the oven to 350F (175C).
2. Melt dark chocolate and butter in the microwave on low (30% works for me). Stir and set aside until lukewarm.
3. In a medium-size bowl, combine remaining ingredients and beat until light and fluffy. Add cooled butter mixture and mix until combined.
4. Scoop ~1-inch balls onto cookie sheets.* Gently press chocolate chips into the tops of each ball.
5. Bake for 12-13 minutes. Let cool two minutes before transferring to rack.
Makes ~33 cookies.
* If your butter-chocolate mixture is too warm, it may look and act more like batter. Pop the bowl into the fridge for a few minutes to chill and you should be able to scoop as needed.
I’d show you a photo of the cookies but, well, I ate them all. Instead, here are some pretty examples of other lights in the darkness.
Enjoy!
Posted in Food and..., tagged 2016election, food, Motivation, persistence, Thoughts on November 9, 2016| Leave a Comment »
Concession Cupcakes:
Dark like my mood, but sweet like my hopes for the future.

Today it’s time for cupcakes. Tomorrow, let’s get to work.
Posted in Food and..., Holidays, tagged #ThingsILike, birthday, cake, chocolate, creativity, food, fun, home, yay on October 12, 2016| 1 Comment »
Target: Caaaakkkkeeee!!!!!
Another year, another cake:) For this year’s birthday I wanted a little visual contrast, plus a way to use the last of summer’s fruit. Also, pretty. I went with that classic good time, chocolate, and a buttercreamcheese frosting.
Two layers, baked and cooled and torted to make four. To shake things up a bit, I added a thin coating of raspberry jam before frosting the first and third layers, to bring out a touch of fruit flavor. Crumb coat. Thick frosting top. Chocolate ganache trim, topped with blackberries, raspberries, blueberries, and mint, with a buttercream flower to wrap it all up.
Cutting it was scary, but worth it.
So tasty!

You must be logged in to post a comment.